The third part of this blog series about the development of our demo. This part if focused on Amiga and Cross platform.

#Introduction A demo is nothing without graphics. My basic idea was to take our old framework (GOA) which we had used previously (Goatage, Enlight the Surreal, Sketch, etc..). This library is pretty old (developed in the years around 1999) but very solid. The only problem was it only had true color support (full 32bit RGBA) and it was floating point all the way (developed for Pentium machines). We have an even older library (SAGA) but that was one was really horrible (in terms of code) - it was developed in the mid 90’s for 486 computer and 320x200 MCGA.
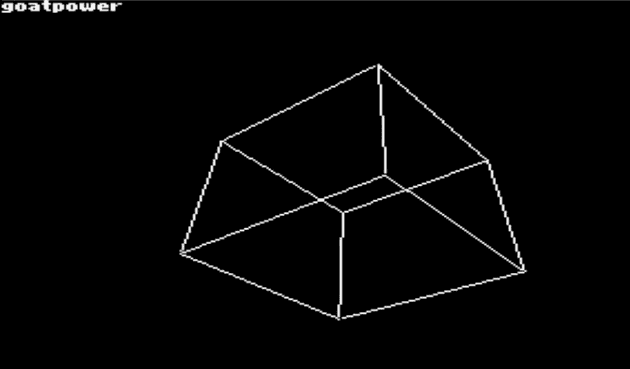
In June 2018 I had the hello world of graphics running; a spinning cube. This made me very confident that we could do it.
The main problem, at this point, was getting the system environment up and running. Properly Amiga OS integration, Display handling, getting C2P (chunky to planar) working and a general understanding of the Amiga 1200 hardware (like the copper and setting the palette). There are plenty of resources available on the internet but at the end of the day you have to read ALOT to understand how the target platform is working. This was something I exepected but I underestimated.
At this point I had:
- Amiga System and Display initalization
- Chunky to Planar conversion
- Basic GOA integration (more about this later)
At least I knew we would be able to proceed with the demo and the coding. Even if the road would be a bit bumpier than I initally thought.
#Old habits die slow Coming back to something you have done before always pose a risk that you also revert to methods from the past. This happened a couple of times in this case as well. I was reverting to assembly for many things where plain C code would have been sufficient. It happened more than once that I got a wake up call. One of the best moments was related to my cooper handling. Which I had done in assembler (including the inital palette handling). I was asking around for how to handle $DIWSTRT and $DIWSTOP (basically two variables controlling the raster), after a while I was kindly given calculation code for it. And when I looked at it I realized that the copper can simply be treated as a 16bit unsigned buffer with interleaved instruction/data values. Converting this to C gives you a nice structure with proper names. And then you just allocate them in CHIP memory. There is NO need reverting to Assembly for this kind of shit (if your target is similar that is). I didn’t have the time to fully convert my copper handling but I could at least pre-calculate the copper list and spit out the correct table. Next time it will be fully handled from scratch in C.
#Fast iteration is key When developing you want fast iteration cycles between coding and running/debugging the code. Deploying to the Amiga (at this point) required me to transfer files via a CF card in the FS-UAE Amiga emulator before I could run it on native hardware. This was a bit irritating so I started using the emulator (and the integrated console debugger) for my basic needs. Later (too late) I got a PCMCIA network card (thanks Krikkit) and the Amiga is now connected to my LAN and I can push new executables to it - much like a very simple CI/CD platform.
While this was good for testing full executables and the demo itself it is way to problematic to debug/develop algorithms properly.
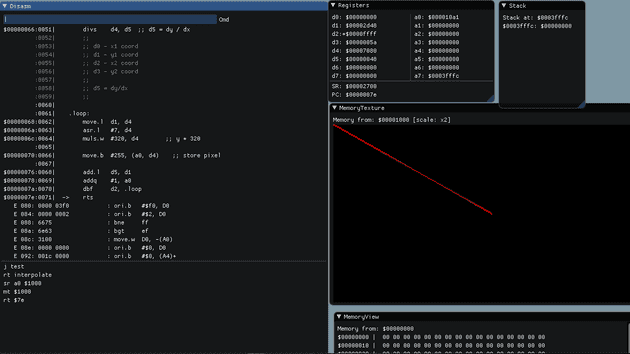
#M68k simulation/debugging To speed up the code iteration of specific algorithms, specifically the graphic primitives (drawline, fill polygon, etc..). I tried to develop a M68k Simulator/Debugger. This turned out quite well and helped us immensively in the end.
The debugger can load an Amiga executable (with line symbols) and allows you to step through it while also seeing your source code. It tracks use of registers and CPU states. It also has a possibility to display a memory area as a C2P display would do it - allowing us to develop graphical primitives. The debugger also reads the symbol table and you can use it everywhere you want, like mt backbuffer (mt = memory texture).
Note: the simulator does NOT emulate an Amiga - it emulates a 68k CPU.
The debugger and simulator is fully open source: https://github.com/gnilk/m68ksim See the github page for more details and description on how to use the software.
I relied on the following projects when writing the debugger:
- Musashi (https://github.com/kstenerud/Musashi), as the 68k engine
- imgui (https://github.com/ocornut/imgui), for the User Interface
- AmigaHunkParser (https://github.com/emoon/AmigaHunkParser), for parsing Amiga executables
A problem with Musashi (the m68k engine) is support for modern versions of the CPU (no 68060 support).
#Cross platform development Even if you are targetting a different platform there is nothing stopping you from having a 1:1 mapping of the API’s you use on your primary platform. In our case the GOA engine was built as a cross platform engine from the start and it used to work on a variety of systems. Thus I knew that if I relied on the GOA API for my system needs it would run on the Amiga. GOA is a pure C99 library, getting it to compile on modern systems was very easy. The only required change was adding a display driver for macOS as this was a previously unsupported platform. For macOS we use GLFW3 (see: https://www.glfw.org/) as the underlying driver for the display and wrapped it up in a GOA display driver. GLFW is a cross platform OpenGL display wrapper.
Similar to making the Amiga Display driver use C2P to convert the internal GOA bitmap image to Amiga bitplanes we upload the GOA bitmap to an OpenGL texture and render it on macOS. GLFW is used to open the display and handle keyboard, mouse and other events.
This allowed rapid prototyping of effects directly on the mac and once we settled on something we could port effects to the Amiga. This methodology was used throughout the development of the project. Therefore the actual demo also runs natively on macOS as well. Which is the version we used to render the YouTube video. The YouTube video is an offline rendering of the demo at a fixed 50fps timer piping the RAW video stream directly to the encoder (ffmpeg) without the need to display it.
#Lessons learned (so far)
- Get your target API 1:1 with your development platform
- Make sure you can quickly deploy to the target platform
- Develop tools if they enable a shorten turn around time between code and test/debug
